Pages

Popular Posts

Sunday 24 February 2013

Yay.....I'm back online!!!!

I have been outta action for a few days as my ipad had a terrible accident (with a little help from Annie!!!) anyway it's all fixed and as good as new now so I thought I would share wi you a card I have made featuring "boobie" from saturated canary. Half the proceeds from this card will go towards breast cancer care, and it can be seen for sale on ebay.

I have used my favourite colour pink!!! Then I have used die cuts, ribbon, lace, flowers, crystals, pearls, and pretty much everything I could find!!! I have coloured boobie using copics, I have used greys to make the shirt and jogging pants match the black and pink theme!!! HOpe you all like it.


Thursday 14 February 2013

Valentines and Exciting Stuff!!!!

Happy valentines!!! Seeing as it is valentines I thought I would share with you some great news!!! I have been accepted on to a new design team!! I will be designing for cuddly buddly crafts!!! I'm so excited with my new challenge and I can't wait to start!!!!

I thought today I would share with you a new whimsy stamp that I purchased cause I just think she is soooo cute!! And seeing as though it will soon be spring (let's hope it's not long away!!) I thought I would colour her using turquoise and pink (my favourite combo!!!) probably more summery than spring but never mind!!!

I used pencils to colour this image as I wanted a pastel finish to the image then I used my usual embellishments!!!

I love this image and I am so glad i have started trying different images to stamp and colour!!!

Tuesday 12 February 2013

Brrrrr...it's never to cold to craft


Hi everyone!!! I'm certainly feeling the cold after being away in the beautiful sunshine!! I suppose there is always some bonus about coming home.....CRAFTING!!! plus I ordered loads of stamps before I went away that we're all waiting for me when I got home!!!!
So I have been playing and colouring (lots and lots of colouring!!) and I have made another vintage style card using the exclusive stamp from magnolia.

I just loved using all the vintage style embellishments to this card and especially using my new Tim holtz markers to colour!! (Did anyone else find these difficult to get along with at first??!!) anyhow I have out this card together using my favourite Melissa Francis papers and some vintage lace and pearls!!!

Have to go to get the pancake batter made!!!! Mmmmmm pancakes with orange and sugar.....what do you have with yours???


Saturday 26 January 2013

My first valentines card!!

Well here I am again!! And I will present to you my first valentines card!!, as I said I have now discovered saturated canary stamps!!! Wahoo!! I'm in love with them!!! I have also ordered some kraftin kimmies, kenny k, mo manning, lili of the valley and some whimsy sylvite zee!! Can't wait to play with them all!! I have also ordered the set of Tim holtz distress pens and I am eagerly waiting there arrival from America!!
Anyway back to my first valentines card for this year....I used little lady bug stamp from saturated canary, I stamped her in black memento and coloured her using copics and then glittered her using Stickles.
I cut her out using spellbinders teardrop circle and then inked over the die using it as a stencil with Tim holtz black soot.
I used cooredinations card stock and may and layered with some patterned card stock, then I sanded the edges to create a distressed look.
I repeated this with other card stock and punched a border.
I then used silicone to mount my topper and used a selection of flowers pearls lace and ribbons to embellish my card.

I also have to share with you all my new love......a splodge mat!!! Now I have read mixed reviews about the splodge mat but I absolutely love it!!! I have always been able to blend successfully without one but it makes it so much easier and such a smooth blend (if that makes sense!!) everyone should try one!!!

Friday 25 January 2013

My magnolia love coasters!!!!

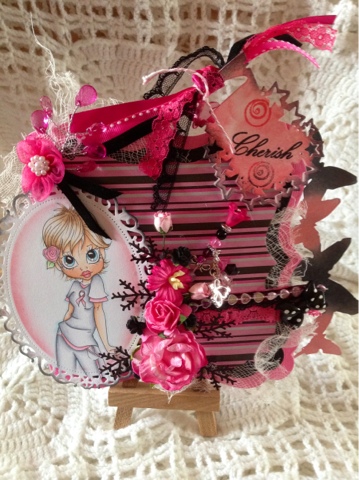
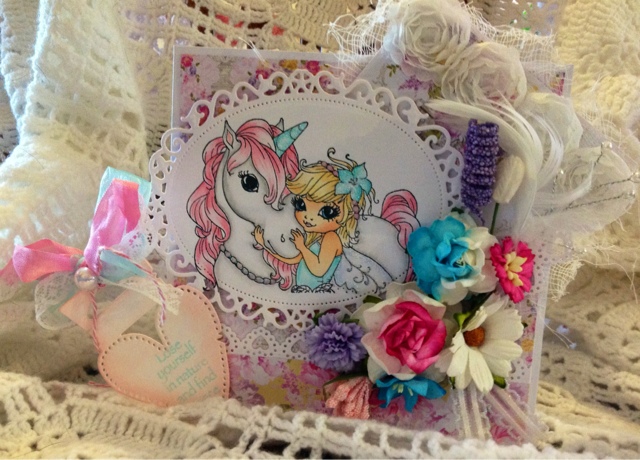
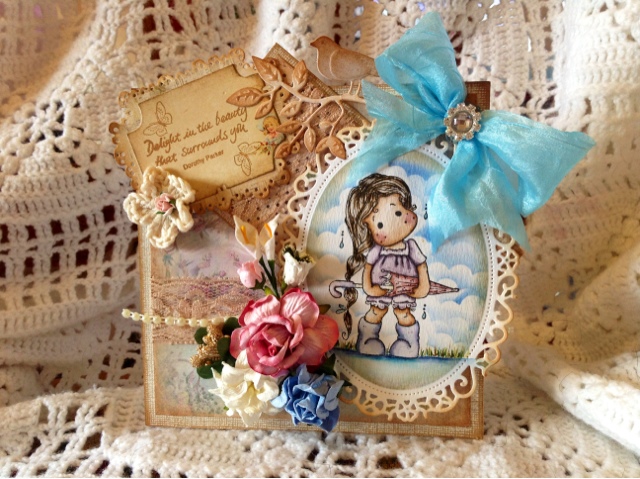
Hey everybody back again (yes I know twice in one day!!) so anyway here is how I made my very popular love coasters from the magnolia 2013 collection!!!

To make these you will need:
A pack of undecorated MDF coasters.
A selection of your chosen magnolia stamps.
Watercolour paper.
A selection of Tim holtz distress ink pads.
Some vintage looking lace.
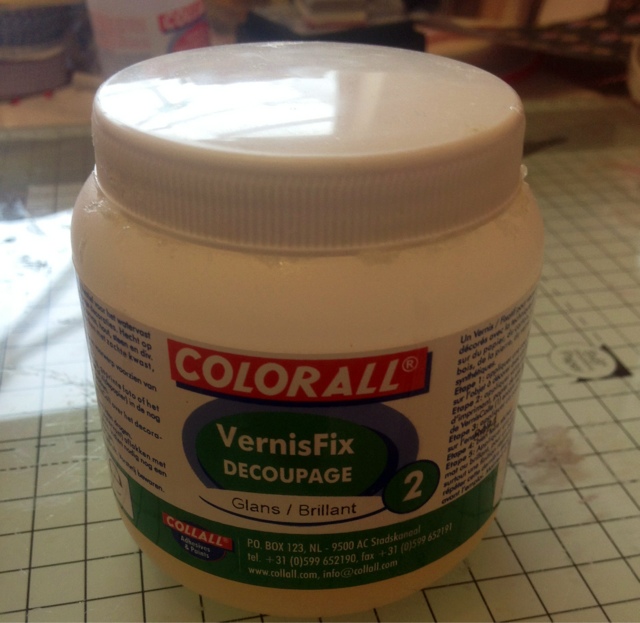
Collal decoupage varnish.
Collal glue.
Sanding block.
sheets of 12x12 vintage style papers.
Cut and dry foam.

To start making these gorgeous coasters I drew around each coaster onto my papers with a pencil (I used Melissa Francis papers and picked exactly which part of the paper I wanted to see on the coaster).

I then cut each circle out with scissors and mounted them using collal glue onto my MDF coaster , then leave them to dry for approx 2 hours, after which time you can use a craft knife and trim the edges of the paper round the coaster.

Using your sanding block distress the edges of the paper, use vintage photo and a piece of cut and dry foam and ink the edges of each coaster.

Place a piece of lace over the top of your coaster (I placed mine in the middle) and use your collal decoupage varnish to bind the lace to the coaster. You can coat the whole coaster with the varnish but make sure you place plenty over the edges of the lace.

While these are drying you can start and stamp your images onto your watercolour card and colour them with tim holtz ink. I then cut them out and used Martha Stewart glitter and glittered them in places.

When the coasters and the images are dried you can again use vintage photo to distress the edges of each image.

Now you are ready to mount the images onto each coaster, you do this by using your collal glue and placing them as desired on each coaster, again leave to dry.

When the glue has dried you can now Varnish the rest of the coaster with your collal decoupage varnish. Make sure as you are doing this you pay close attention to the edges of each image make sure you get plenty of varnish around the edges as it will bind the image to the coaster and ensure that the coasters are waterproof!!! I coated mine 3 times with the varnish to make sure the images were binded properly.

Please note the ink from the images and the distressing will move around when you are varnishing them, for this reason I washed my brush several times to ensure the minimum amount of ink was transferred!!!

I hope this helps everyone, and I will do a you tube video as promised but I am going away for. Week on Sunday so it will have to be when I return!!! If you have any questions please ask and I will try and help you xxx


Wow!!! I have finally discovered mobile blogging!!!!

Hi everybody!!! I seem to have finally discovered mobile blogging which now should make it so much easier to keep everyone up to date with all my creative makes!!
I have been so busy lately with the children and making things ready for valentines day. I have also decided that as well as my favourite magnolia stamps I will try others like saturated canary and kraftin kimmies!! I have discovered some beautiful stamps and the colouring you can do is amazing!!!
Anyway back to creating my posts for valentines day and a mini tutorial for my coasters that everyone seemed to love!!!!

Thursday 21 June 2012

Tilda Of Sweden


OH MY GOODNESS.................where has the time gone??? well i have had a very busy few weeks and I still have a very busy few weeks to come!!! I have though been able to make a couple of cards, in the middle of creating for the design team and partying for the jubilee!! I hope you like her Tilda of sweden done in the up and coming scandinavian style (vintage to you and me!!!).

I have stamped her and her wagon onto watercolour card in black stazon I have then coloured her in with my beloved distress inks.

Then I cut out a 6x6 shape on my grand calibur and mat and layered patterned papers over the top.

I embellished the card using lace (my favourite at the minute!!!) several die cuts and my very favourite of all time.............flowers!!!

I attatched a fairytale tag to the top of the card and printed off my own made sentiment which i also distressed. I accented my card with liquid pearls.

I have a new love for colouring in with distress inks and I am totally addicted to them!! I just seem to be able to create much more depth with the inks than with pens.